 Following up our previous blog post, which you can check out here, today we will be showing how it is possible to setup a secure two factor authenticated VPN solution with open-source components.
This post will be more technical in nature but, as always, if you have any questions or would like to talk to Bitstream Technologies about this solution or something similar please be sure to use our Contact form on the home page. With that being said, let’s jump into it!
The hardware and software requirements:
- pfSense(we recommend Netgate’s appliances)
- OpenVPN Package
- FreeRAIDUS Package
How users use this solution:
All users will be provided with an OpenVPN installer or OpenVPN config files depending on their operating system. Users will sign in with a username, a PIN + a one time password (OTP) when they connect.
Flow chart for user authentication:
Since multiple pieces of software are being used to process user authentication, it may be helpful to see how this solution works in a flow chart:

FreeRadius Setup:
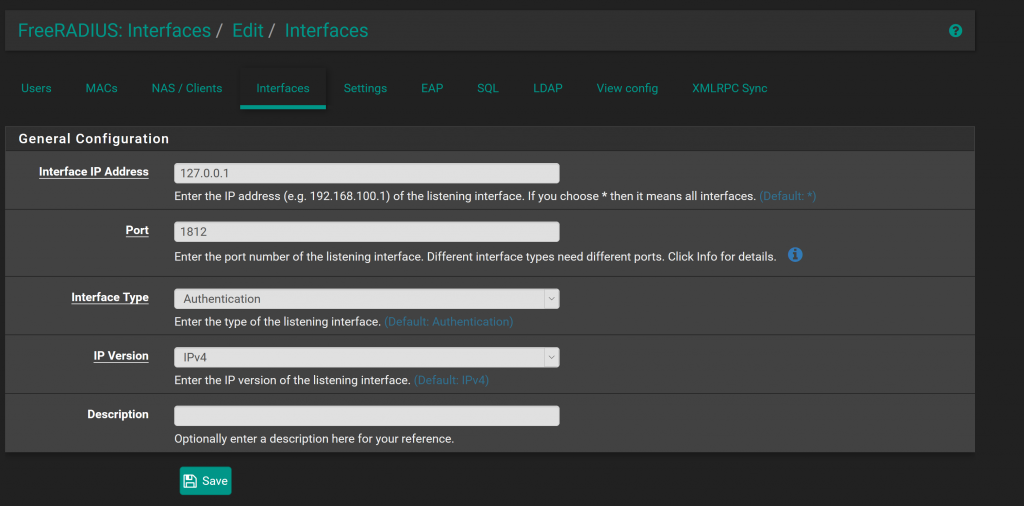
Navigate to Services > FreeRADIUS > Interfaces.
We need to define a loopback interface which is used to listen to requests that come from pfSense. Technically this could provide a service to other applications on the network as well, but is outside of the scope of this article.
- Interface IP: 127.0.0.1
- Port: 1812 (Radius Default)
- Interface Type: Authentication
- IP Version IPv4
Define Radius Client:
- Client IP: 127.0.0.1
- Client IP Version: IPv4
- Client Shortname: Description you would like
- Client Shared Secret: Random generated password that we will use later in the OpenVPN configuration

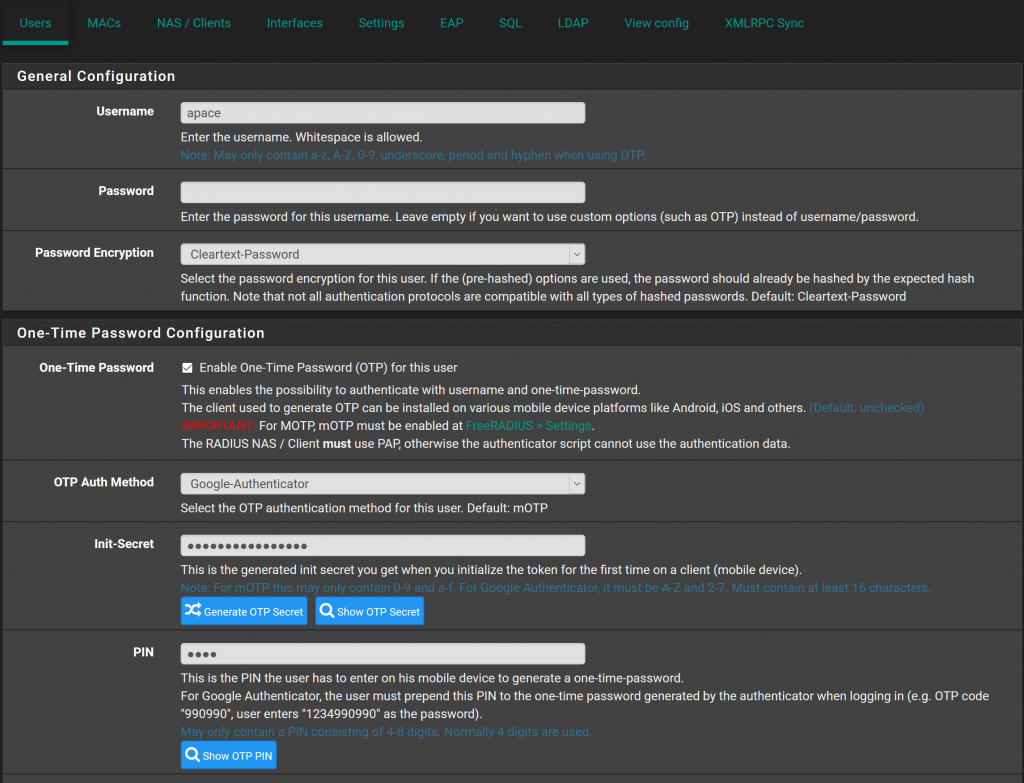
Configure users:
All users will need to be defined locally in the FreeRADIUS server. FreeRADIUS does support binding to LDAP/AD, but not for two-factor authentication.
- Fill out the information for the user, such as name etc.
- Leave the password field blank
- Check the box for “Enable OTP For this user”
- OTP Auth method use “Google Auth” Note that this is not limited to the app Google Authenticator, and many apps support this method.
- Generate OTP Secret
- Enter a PIN
The “OTP/Init Secret” is what the user would have to enter to setup the 2FA on their mobile device. There is an option to also scan a QR code in this section.
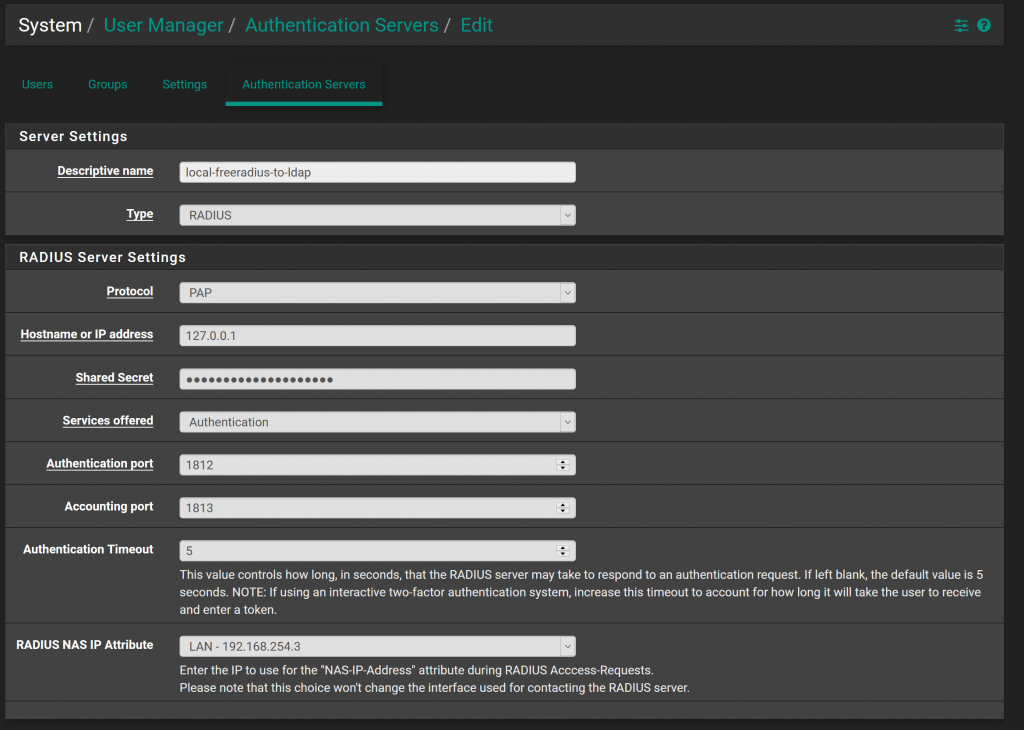
Configure Authentication Source:
Pfsense supports multiple authentication sources. For Openvpn to be able to utilize this, we need to define this using the settings above.
Navigate to: System> User Manager > Authentication Servers.
The screen shot will provide most of the settings. A few details though:
- Protocol PAP: This solution only works by using PAP currently. Although PAP is not a generally a secure protocol, the risks are low as the authentication traffic never leaves the device.
- Shared Secret: Insert the password from the FreeRADIUS client configuration
- RADIUS NAS IP Attribute: Set this as your LAN Interface on the network. This is more important if the FreeRADIUS server was hosted elsewhere in the network.
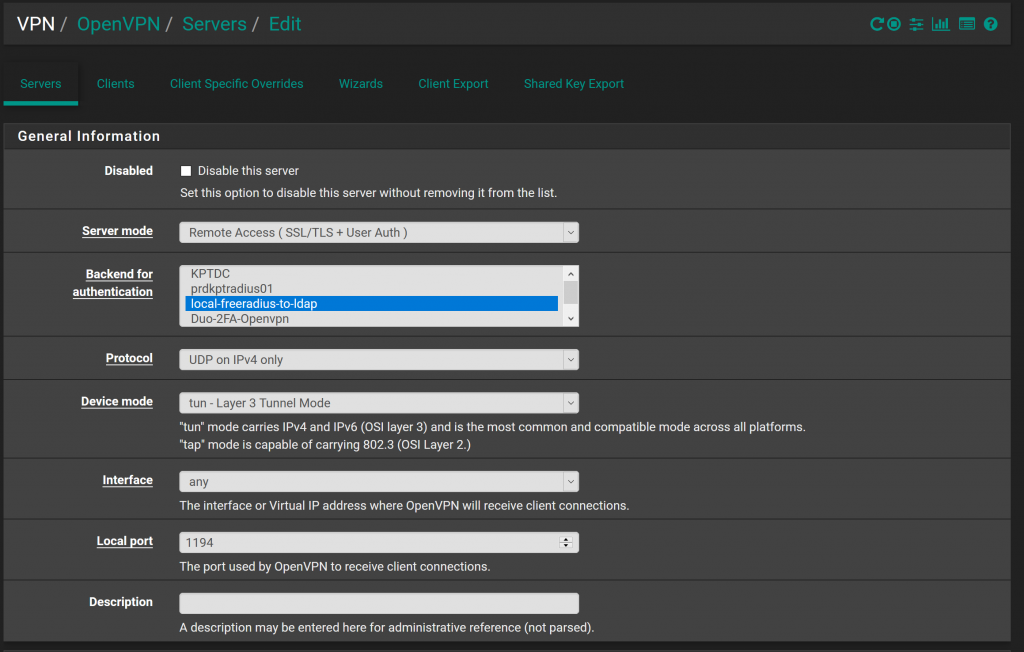
OpenVPN Configuration:
Now we can configure OpenVPN as a server to listen for clients to establish a VPN tunnel to and use FreeRADIUS as an authentication backend.
Navigate to: VPN > OpenVPN > servers > Add
- Server Mode: Remote Access User Auth
- Backend for Authentication: Select the name given for FreeRADIUS
- Local Port: May be different for installs, can be changed to a free port on the WAN.
The rest of the settings can remain at defaults.
Client Export:
Finally, export the user configurations.
VPN > OpenVPN > Client Export.
Make sure that the proper Remote Access server is defined, and if you do not have a static IP, we recommend setting up a DDNS host name and then selecting that as an option in the “Host Name Resolution” so clients do not have a hard coded IPv4/IPv6 address that may change.
Finally, scroll to the bottom and for each user you have multiple options for export depending on OS. For most installs using Windows, using the “current windows installer” is the best option as this will install OpenVPN and the profile on the users machine in one step.
Distribution to users:
Each user will need to download a 2FA app on their device. Google Authenticator or Authy are great options.
Distribute the OTP Secret and OpenVPN installer file in a secure method, i.e. encrypted email!
The user will then input the OTP secret into the authenticator app, and install the openvpn software. When the users connects, OpenVPN will prompt for a username and password.
Username= username that was defined in the FreeRADIUS config.
Password= Pin for user + the OTP code displayed in the 2FA app. IE if pin was 1234 and OTP was 56789 the user would enter “123456789”.
Conclusion:
We hope this shows how a VPN can be configured and how to secure user authentication. This is a great, low cost option for small companies without many users. For bigger companies we would tweak this solution slightly by using some different software that can support syncing with the existing Active Directory or LDAP environment to avoid maintaining users in two environments.
If you have any questions about the steps above, or you would like support with a solution like this, make sure to reach out to Bitstream Technologies via the contact form or calling us at 412-212-0902 and we will be happy to assist!